freelancer.com

Tuesday, June 26, 2012

DIY Manicure with Nyx polish

Last night I decided that it was past time for me to polish my nails and toes.

I was a little disappointed at the color I chose. For one, it's summer. I'm naturally attracted to something bright during this time. As I started to apply the purple polish I noticed that it nearly matched my skin in tone and kind of drowned me out, so not wanting to start over I tried to think of something I could do to make the color pop, so I applied this gold glittery polish on top of the purple and it came out like this.


I took the picture outside in the sun because that's where the color really pops, but I'm still on the fence a bit on whether I like it or not.

The colors are:
NYX Between Mauve and Purple
NYX Roots


Monday, June 25, 2012

Completed Sewing Project: New Look 6102!

I'm starting to slowly notice that I just have a tendency to do my own thing when it comes to these patterns. What I liked most about this pattern was that it was only 4 pieces to cut out. I really could have only cut out 2 pieces, since I did my own binding and I didn't use the elastic in the shirt. I'm thinking maybe I should go back and use to elastic, since I like the look on the cover, but I don't know.

I did my own binding, using my Binding Technique(Posted on my blog) and I did my own thing with the hem. I did like a stay stitch at the bottom, 1/4th from the edge, and I folded it at the stitch and top-stitched around 1/4th from that. I used the same fabric(a knit) from my Maxi dress btw.

I like the look of the shirt, but I do wish I would have used a different fabric. Maybe something without the stretch, which I probably would have cut a bigger size. I'm also still debating putting the elastic in, but overall, I like the look!

Here it is. I promise to post better pics moving forward.


Sunday, June 24, 2012

Knitted kid Scarf I Designed

Last Christmas I decided to make my 3yr old niece a scarf as a gift. Something she'd cherish and keep forever. Thing is, it was my first scarf and it had been a while since I knitted and completed anything. This project took weeks, but when I finally finished I was thrilled with the results.

Me, being my ambitious self, decided to make it extra special by collaborating with my sister and coming up with the design. I told her to pick a design from a knitting book that she liked and I would do the same. Now isn't this a bit much for a first project? lol

Anyway, I finally finished after a long time and the result was this beautiful scarf that my niece loved! In the near future I plan on maybe making a few more and selling them. To keep it special and unique to her I'll probably switch up the design.


Here are the books that I used to help me design the scarf. In the books there are instructions on how many to cast on to make a specific design and I combined 4 different designs for this scarf.

The Complete Guide To Needlework
The Complete Book of Knitting

(You Can Buy Both on the Amazon Link to the Right)

My Favorite Sewing Books

So far this has been a very interesting journey. I feel that I've come a long way since January, but of course I didn't get here alone. Blogs, and Youtube videos have been a major help, but most importantly, I've learned a lot of what I've come to know from sewing and knitting books. Some of my favorites are...

Singer Sewing Essentials
This is an older book that came with a collection of other Singer sewing books. What I love about this book, as well as the entire collection, is that the directions are very easy to follow and the illustrations are extremely helpful. I'm a very visual person, and this book provides what I need to in terms of being able to see how the steps are done. I also like thorough directions, which I try to give, because I believe each step is important and mistakes are made from a person not understanding and having to "fill in the blanks," Anyway, it's a very good and helpful book and it's definitely been a staple in this process of learning to sew.

http://static.artfire.com/admin/product_images/thumbs/--30000--868_product_1883732290_thumb_large.jpg

Sew Step By Step
This was the first book I purchased when I decided to pursue this hobby. It's also a book with tons of illustrations and pretty thorough directions.  At the time, all the information seemed a bit overwhelming but as I continue on and sew more I find myself coming back to this book. This is actually the book where I learned the size to cut the bias strips from my last blog. I really like it as a beginners book, and another staple it is.

http://ecx.images-amazon.com/images/I/51n4cUs527L._BO2,204,203,200_PIsitb-sticker-arrow-click,TopRight,35,-76_AA300_SH20_OU01_.jpg

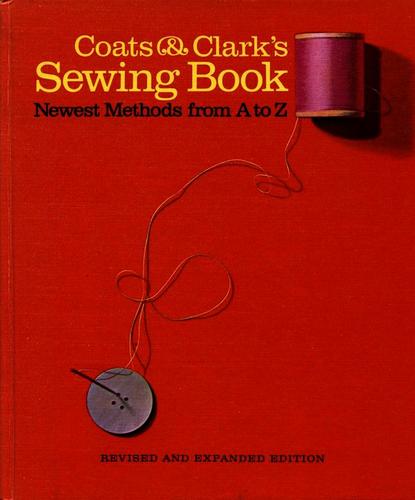
Coats and Clark Sewing Book
This is another old school book but I absolutely love it! The instructions are very easy to follow, and although the pics are in black and white, it doesn't stop this book from being completely awesome. I find myself reading this one a lot as well and this is hands down the best reference book you can have. Possibly all you need.


http://ecx.images-amazon.com/images/I/41uY+3YlewL.jpg


And these are the three that have helped me the most. Again, I just started sewing in January, and already I personally think I'm doing a pretty good job, but I give credit to these books. I feel that everyone should have at-least one of these as a staple and you can spread your wings because the fundamentals will be covered if you start with this.


On the link to the right you can click at the top on Sewmean and order any one of the books. I also have a few other favs, and a wish list of what I want to get into in the near future.

Friday, June 22, 2012

Sewing Project for the week: New Look 6102

browsed through the pattern section in Walmart and found this.

This will be my first New Look pattern. I usually shop the sales at Hobby Lobby, and the only sales they’ve had since I’ve been sewing are on Simplicity and McCall patterns. This pattern was like $2.97 or something, so it wasn’t bad and I liked the look of the shirt so I jumped on it. Actually, there were quite a few patterns I liked. This Walmart will be seeing me more often!

My plan is to make the shirt with the left-over pink knit material I have from the maxi dress. Hopefully, it’s enough material left. If not, I’ll just use to blue. I’m planning to start and finish it by Sunday, so I’ll post the pics of the shirt sometime this week. Wish me luck!!

Completed Sewing Project: McCalls 6559 maxi dress

Finally, I finished the dress!! Yay!

Unfortunately, I was unable to get a really good picture, and unfortunately, I am unable to explain how I did my version of color-blocking. I didn’t come out exactly how I wanted, because I wanted a tighter fit around the neck and armhole edges, but I’m pretty happy with it.

As far as the color-blocking, all I know it that I tried to have the blue strip 11in and the pink strip at the bottom 11in. Really, that was a headache because it was confusing with trying to add the seam allowances the both and trying to measure in a hem, which is why I didn’t do one in the end.

Well, this is the best picture I could take with my phone. I hope you all get an idea of what it looked like.
Image

My Binding Technique(lots of pics!)

Soooo, for the week I was suppose to learn how to do bias binding(which I did) and learn a hemming technique for the bottom of my McCalls 6559 dress(which unfortunately, I didn’t do).
I felt the length and the look of the dress would be a bit off by a hem, so I’m going to try to get away without one, however, I did learn how to use my own bias binding and I’m updating today with lots and lots of pics and instructions on how I did it. Hopefully, it’s not too hard to follow.

To start, the pics may be a little blurry since I only used my cell, but I hope that you are able to see and understand. Also, I’m not the best at the measurements, so bare with me if you can. Here is the rundown using a sample.

BTW, Make sure you cut off the seam allowance around the neck and armhole edges before placing the binding. I actually lost the instructions to the dress, so I did everything basically my way. I marked off 1.5cm all around the edges, and cut it off.
  • The first thing I did was fold the fabric at an angle to cut my bias strips. In one of my sewing books the measurements of 2 3/4in(7cm) were given, which was too big, but I followed the directions and cut out about 6 strips.

  • So after the strips were cut, I took out my pins, brought my strips over to the ironing board, and folded one side of the strip so that it measured 1cm. I placed the pins into the strips and through the ironing board measuring 1cm down the length. With the other side of the strips I just turned it over, and pinned it to the ironing board as well. When both sides were pinned I ironed over the pins(maybe this isn’t the best thing to do, but it worked for me) and took to pins out and ironed again. It looked like this.
Image
ImageImage
  • After that was finished I folded the strips against the raw neck and armhole edges of my dress(sample here) and pinned it in place with the 1cm side of the biased strip folded along the right side of the fabric.
Image
  • Then I used my sewing gauge and a water soluble pin to measure maybe 1/4cm(?) and make a dot at the mark on bias strip. *I’m not the best with the measurements, so hopefully you all can see where I made the mark.
ImageImage
  • Then I went over to the sewing machine to top stitch and tried to make sure the dot was right in between the middle of the presser foot. Luckily, what helped me most is that the edge of the bias strip falls on the first line on the needle plate(?) so that’s what my eyes followed the entire time. Here’s the pics of that.
Image
  • I then adjusted the tension dials both to 3(instead of 4).
Image
  • And I sewed along the line, and this is the result of it on the sample and on the dress.
Image
Image
And that was it! I hope this helps in some way. I just started sewing in January, so please bare with me in terms of the terminology, measurements, pics etc. I like to read in books, but I also like to kind of figure it out as I go, and do it in ways that appeal to me. For example, the 1cm measurement I used to fold the bias strip along the edge was from me taking the measurement on an edge of a shirt that I own and using that, along with taking and using the measurement for the stitching line. If there are any questions I’ll try to answer them to the best of my ability.

Also, please excuse the chipped nail polish lol.

Sewing Project for the week: McCalls M6559


Yep, I have a fascination with Maxi Dresses. By now, I should have made at-least three, but I have yet to start on one. Luckily, I’ve started this blog to get me moving on this dress before the summer is over.
I have this material I got from a fabric store in Decatur, GA. It’s located off of Candler rd, and the name of it is Soul Fabrics. Anyway, the owner had a sale a few months ago where all fabric was 1.99 per yard. Of course, I stacked up and purchased 4yrds of a blue knit, and 4yrds of a pink knit. My goal is to make this dress using both fabrics.
http://mccallpattern.mccall.com/filebin/images/product_images/Full/M6559.jpg
I want to color-block it in a way that’s almost similar to the first illustration with the green, but eliminates the two lighter shades in the middle. Basically, I want it to look almost something like this.
http://images.bloomingdales.com/is/image/BLM/products/4/optimized/8006464_fpx.tif?wid=1200&qlt=90,0&layer=comp&op_sharpen=0&resMode=sharp2&op_usm=0.7,1.0,0.5,0&fmt=jpeg
My usual issues with sewing is the hemming, and the look around the neck and armhole edges. To me, personally, it’s usually what makes the product look either professional or unprofessional, so that’s going to be a challenge along with this being my first color-block attempt, so we shall see how it goes. I’ll have to learn how to use bias binding around the edges, learn a professional-looking hemming technique, and learn to color-block lol. Hopefully, by the end of next week I’ll have it all done with pics. I’ll try to look for and post tutorials, clips, pics on how to achieve the look I want.

DIY manicure with Nyx Nail Polish


I’m a girl on a budget. I like to look nice without spending tons of money to do so. NYX brand nail polish is a very inexpensive brand that offer shades of nearly every color imaginable. I’ve never been one to go and get manicures or pedicures(Extremely ticklish feet lol), so a lot of what I do with my nails and toes are from home.
Recently I was on youtube looking for DIY manicure videos and found this one, which helped a great deal.
http://www.youtube.com/watch?v=B4bqpihDPnA&feature=player_embedded


I pretty much followed the instructions using my .99cent polish and I had very satisfying results of a manicure that lasted 5days. Check it out!


BTW, the color of the polish is called Cherry Pie.

Spring/Summer Trends

Interesting

Crochet being a trend of the summer
http://i2.squidoocdn.com/resize/squidoo_images/-1/draft_lens1835619module159603594photo_1339109497._00_.jpg
http://blog.ibs-b.hu/wp-content/uploads/2012/04/Ladies_Warm_Colors11.jpg


Now I’m not the trendiest person in terms of fashion, but I do like to be up on the current colors, or at-least in the know of the colors of the season. As far as fashion, I like classic looks/pieces that are not quick to go out of style.

This year, my fascination is with Maxi dresses. I plan to sew a few of them within the next few weeks so I’ll keep the blog updated on how that comes along. Now that I’m aware of the colors, it’ll be even more interesting to sew in-style.